Decorating the bathroom with plastic panels
The traditional option of facing the walls of the bathroom is considered to be ceramic tiles. Strong and durable, resistant to moisture and temperature extremes, not fading and easy to clean - bathroom ceramics are an excellent way to protect walls and floors. But the obvious drawback of ceramic tiles - the high cost of the material itself and its installation (and in most cases you can’t do without the help of specialists) scare away many owners who want to make repairs in their bathroom. The most affordable alternatives are plastic panels. In addition to the affordable price, plastic for wall and ceiling cladding has another important advantage - even an inexperienced owner of an apartment or house can cope with its installation, it is enough to have the necessary tools, auxiliary material and free time.

Advantages and disadvantages of plastic panels for bathroom decoration
Most PVC panels (polyvinyl chloride) are rectangular hollow products with perforation inside and a layer of plastic on the outside. A pattern (often imitating marble or wood), photo printing, ornament, or just a color tone can be applied to a PVC layer. The surface of wall and ceiling panels can be matte or glossy. Panels can have different widths - from 10 to 25 cm.


If we talk about the important advantages of plastic panels as a finishing material for bathrooms, then we can distinguish the following:
- high moisture resistance and reliable protection of the walls and ceiling of the bathroom from exposure to water;
- practicality, the ability to clean surfaces with cleaning products (not abrasive);
- the possibility of self-assembly without the involvement of craftsmen (decoration is quick enough and without a lot of debris, noise and dust);
- affordable cost;
- excellent soundproofing of the room;
- wide choice of color schemes (print, imitation of various materials);
- possible execution in a matte or glossy version, with a textured surface;
- a sufficient selection of product models with different tires, allowing you to find the best finish with the least amount of waste.


But the disadvantages of plastic panels are many:
- relative fragility, low resistance to mechanical damage;
- in most cases, the installation of plastic panels requires the installation of a metal or wooden frame - additional costs of materials and time, reducing the useful area of the bathroom;
- poor fire resistance properties, low resistance to fire;
- low environmental friendliness of the material, toxic substances in the composition.


Criteria for choosing plastic for wall and ceiling cladding
For everyone who decided to perform the lining of the surfaces of the bathroom or the bathroom with the help of plastic panels, it becomes difficult to choose the right material from a wide range of modern stores. The variety of colors and textures, dimensional indicators and manufacturing companies can stun. You can solve the problem by the exception method. The criteria for choosing a facing plastic for a bathroom include the following:
Material strength. Products make stiffeners strong - the more they are, the more reliable the lining will be;


The relief or texture of the surface. The more complex the texture of the plastic, the more bulges on it, the more difficult it will be to clean the surfaces. But in some cases, the texture of the cladding is due to the stylistic features of the interior, the chosen design concept;


The composition of the raw materials. As part of PVC panels, the presence of hydrogen, chlorine, and carbon is considered mandatory. In this case, ethylene should be no more than 43%, and bound chlorine - no more than 57%;


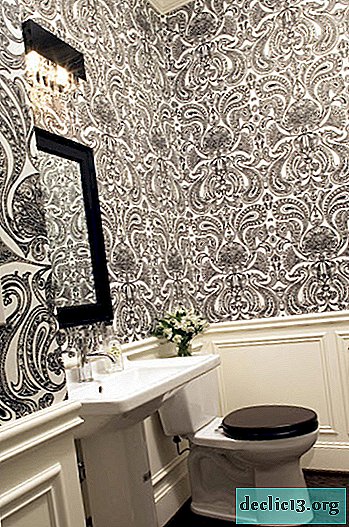
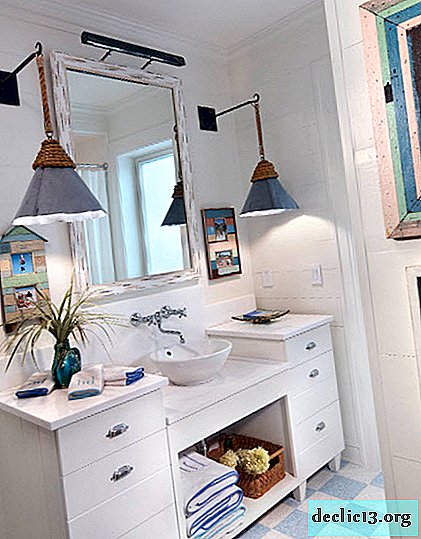
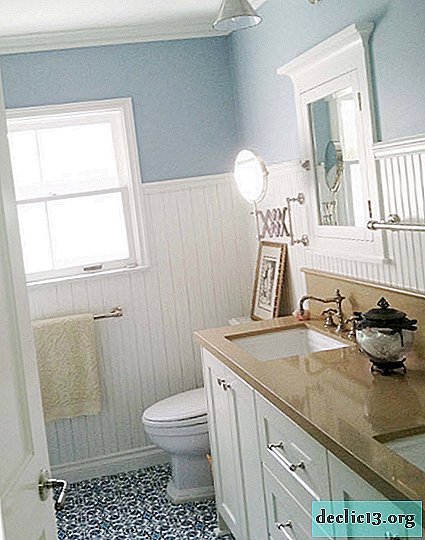
The color of the panels. For a small bathroom, it is better to choose bright, pastel shades in a glossy design - this technique will visually increase the dimensions of the room. In spacious bathrooms, you can use more saturated and even bright colors, contrasting combinations, the use of the effect of an accent surface;


Print or patterns on the facing material. If you place decorative inserts with a pattern vertically, you can achieve a visual increase in the height of the ceiling in the bathroom. A small print located across the panels will help to visually increase the volume of the room;


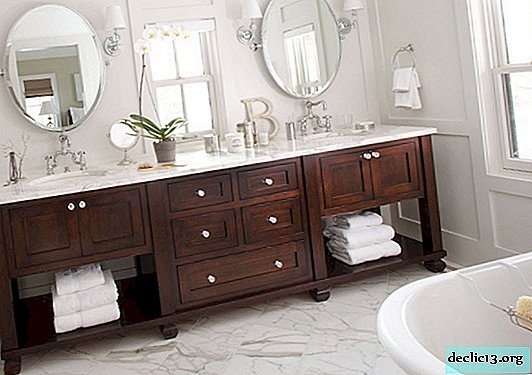
Imitation of natural materials. If you need plastic to mimic a wooden or marble surface, then aesthetics are higher than cost - a spectacular material that can create the right interior atmosphere will cost a lot.


Methods of mounting plastic panels
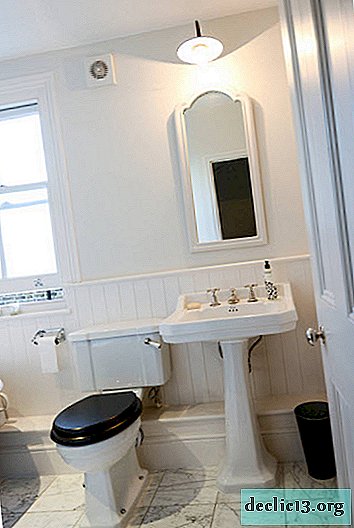
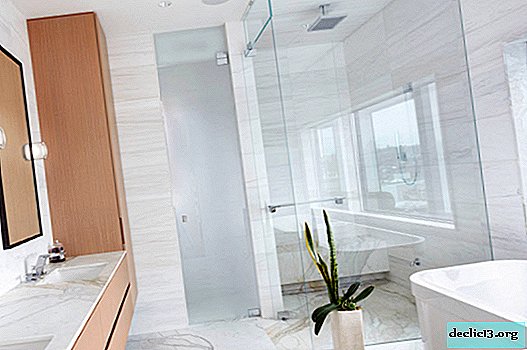
Before considering possible options for finishing with PVC panels, a few words should be said about which rooms it makes sense to use a similar design method. In the combined bathroom of a typical apartment there is enough space to carry out the installation of panels or lose a few centimeters due to the installation of the frame. "Replenish" these losses with the help of a competent choice of the color palette of decoration and visually increase the room. If you need to hide old pipes, not plastered walls or any other architectural imperfections in the utilitarian space - PVC panels will help to cope with this task.


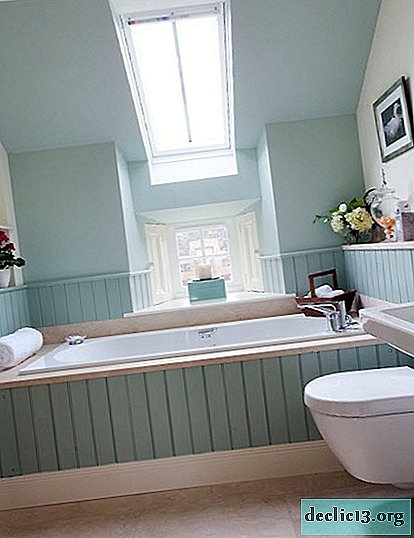
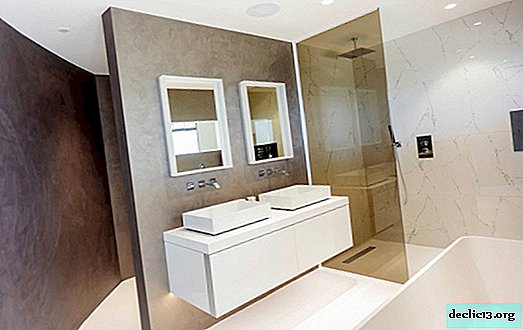
In small bathrooms, plastic panels can be used to decorate the ceiling - inexpensively, quickly and quite aesthetically. Glossy surfaces will help visually "raise" the ceiling, and the specifics of the installation will allow the use of built-in lights. In spacious bathrooms, plastic can be used as one of the materials for combined finishes. PVC panels can be lined with a so-called apron (surface above the sink and near the bathtub), and the remaining planes can be decorated with moisture-resistant decorative plaster or wallpaper with similar properties.


Tools required for PVC paneling
One of the advantages of finishing with plastic panels is that it can be done independently and fairly quickly. To do this, you only need to have a certain set of tools, free time and patience. So, you will need the following tools, mounting materials and additional elements:
- drill;
- screwdriver;
- hacksaw;
- pencil, ruler, tape measure, level;
- glue, sealant;
- screws, dowels;
- moldings and baseboards, corners made of plastic.


Depending on the choice of the method of mounting panels made of plastic, the list of additional materials can be supplemented. Currently, there are two methods of fastening panels - with the manufacture of the frame and without it.


Wireframe mounting method for plastic panels
This installation method does not require prior alignment of surfaces, plastering, cement treatment. The walls are cladded without glue and any other mixtures, the so-called "dry method". This installation option will allow you to replace the panel, which has undergone some kind of mechanical impact and has lost its "marketable" appearance.


The frame is manufactured using metal profiles that are attached to the walls (or ceiling) of the room, and plastic panels are already mounted to the resulting structure. Like any frame manufacturing, it all starts with measurements - the height of the room from floor to ceiling. Next, profiles of a given size are cut and screwed to the wall with a screwdriver, level and metal fasteners (in increments of 50 cm). A similar pattern of fastenings occurs with horizontal profiles - usually with a pitch of 40 cm. It turns out a cellular frame, which will be a reliable and strong base for mounting panels.


As a rule, a heater is placed in the cells obtained - usually polystyrene. This material is easily trimmed to the desired shape, quickly and easily attached, serves as an excellent insulation and soundproofing layer. After the entire insulation is laid, you can proceed to the direct installation of the panels. It is not difficult to do this - products of the required length are cut and, with the help of screws, are attached to the profiles. After installing all the panels, it remains only to glue the upper and lower skirting boards.


Glue method for facing surfaces with PVC panels
The glue or frameless method of installing plastic will require you to pre-treat the walls with a primer (you will need to wait about a day to dry the surfaces). Adhesive consumption will depend on the curvature of the surfaces of the walls or ceiling. As an adhesive mixture, you can use liquid nails.


The panels are cut using a hacksaw of the desired size. Glue is applied to the inner surface of the PVC panels (as a rule, in a checkerboard pattern, 5 cm back from the edge of the product to avoid smearing of the adhesive mixture). Next, the panel is pressed against the wall, but with some caution, so as not to damage the product with excessive zeal. Immediately after this, the panel must be removed from the wall for 5 minutes to dry and then put back in its place completely. Only at first glance the algorithm seems complicated and time-consuming, the installation is quite fast.


Plastic bathroom ceiling
Finishing the bathroom ceiling with PVC panels is a quick and inexpensive way to not only protect this surface from moisture, but also the ability to hide the unevenness of the base coat. In addition, it is not difficult to integrate lights into the space of such a suspended ceiling formed from a frame and panels, thereby achieving not only a sufficient level of lighting for the bathroom, but also the aesthetic appearance of the ceiling and the entire interior.


For facing the ceiling in a bathroom or toilet, products with a glossy surface and a width of 20-25 cm are usually used. For the installation of ceiling panels, a frame is also necessary. This marking is carried out using a water level. First, a starting mark is made on one of the walls, then they pass with a level in all corners of the room, then with the help of a device called a chocline, assembly lines are beaten.


The frame for ceiling cladding is most often made of two types of slats: 2x4 cm or 2x5 cm wide. As a rule, slats are made of pine or spruce (both rocks have sufficient moisture resistance and are not able to deform for a long time). The fastening of wooden battens is carried out by U-shaped suspensions with a pitch of 40-50 cm. In those places where the built-in lights will be located, it will be necessary to strengthen the frame.


Unlike wall panels, the installation of ceiling products begins with the installation of a ceiling plinth. It must be screwed to the wooden frame with screws. Further, it is very simple to insert the panels, first placing them “under the baseboard”, screwing them with screws or using a construction stapler to the rails. If screws are used for fastening, it is best to use products with press washers, because the humidity in the bathroom is very high.


During the installation of ceiling panels, it is important not to forget to bring electrical wires for the subsequent installation of lamps. The final stage of the entire plastic bathroom decoration is always processing the joint joints with an antiseptic antiseptic.


Watch the video: Tile Stickers Make Decorating Easy (November 2024).


-
Hair masks at home - 23 unique recipes
Shiny and silky ringlets were considered and are considered the standard of beauty and a symbol of health of the owner. Women attach special importance to hairstyles, and well-groomed hair is an obligatory attribute of a lady. Each lady should be able to make masks to strengthen and grow hair at home. Hair care is a common topic of conversation. ... -

-
-