Paper flowers: do-it-yourself turn-based workshops
Every year, the popularity of paper flowers increases significantly. This is not surprising, because they can be used as decor for home or special occasions. In addition, they are often made for photo shoots and simply as a small presentation. Therefore, we have selected for you the most interesting master classes with which you can definitely do something worthwhile.


Corrugated Paper Bells
The composition in the form of bells is very tender, so it is often used as a props for photo shoots. But if you wish, you can put it at home as a decor.

Such materials will be needed:
- ombre corrugated paper in blue, white and green;
- flower pot;
- floristic wire:
- thick wire;
- scissors;
- glue gun;
- ruler;
- pencil;
- floristic sponge;
- the stones.
First, take the paper with the ombre effect and cut a rectangle of 20 cm x 25 cm size from it. Fold it with an accordion, as shown in the photo.

Cut the top of the paper in a semicircle shape.

We unfold the paper and stretch each semicircle a little alternately.


Gently fold the corrugated paper in the shape of a cylinder.


We collect an even edge into the bundle and insert a piece of thick wire into it. Apply glue and leave to dry completely.


We straighten the flower from the inside and give it the shape of a bell.

We take green paper and cut off the strip. Wrap the base of the flower and the wire. We fix the tip with glue.


We make four more flowers according to the same principle. We attach them to a thick wire that will be a stalk. Wrap it with a strip of green paper. Cut off a piece of floristic sponge and place it in a flower pot. Carefully insert the flower arrangement and fix it with stones.

To make the composition look more natural, we cut leaves from green paper. On the inside, glue a thin wire to them, as shown in the photo. This will give them the necessary shape.

We fix the leaves in a pot and additionally fix with stones.


Stylish flower arrangement in the form of bells is ready!

If you wish, you can make it in different shades, it all depends entirely on your imagination.

Paper flowers for children
The quilling technique itself is quite complicated, but nevertheless this master class is suitable even for children. Despite its simplicity, the composition in the form of hyacinths looks very beautiful. Therefore, it can be used in room decor.

Prepare the following:
- colored paper;
- scissors;
- wooden skewer or knitting needle;
- pencil;
- ruler;
- glue in the form of a pencil.
Cut a strip of 22 cm x 3 cm from colored paper. If you plan to use A4 paper, just cut it into three or four parts.

We retreat from the top edge of 1 cm and draw a line along the strip. Then we make cuts on the workpiece, as shown in the photo. It is very important that the strips are the same size, so you can pre-make notes with a pencil.

Using a wooden skewer or knitting needle we wrap each strip until it stops, as in the photo. Please note that the line we plotted before should be on the back.


From green paper we cut the same strip as for the bud.

Gently twist one of the corners of the strip. Put a little glue on the entire length and turn it into a tube.


As a result, the tube should look that way.

We take the blank for the bud and apply glue to the inside.

We begin to tightly wrap the strip with curls around the tube in the direction from top to bottom or diagonally.


The tip of the workpiece is fixed with glue.

We begin to prepare the leaves. To do this, cut out a piece of green paper measuring 3 cm x 8 cm and fold it into an accordion.

Carefully cut the workpiece, giving it the shape of a leaf.


As a result, the blank should look like in the photo.

Apply glue to the lower part of the leaves and attach them at an angle. Then tightly wrap around the stem.


Beautiful paper hyacinth is ready!

You can make several more flowers from different shades of paper to create a beautiful composition.

Corrugated Paper Roses
Unlike previous workshops, this one is rather complicated. Therefore, you will have to practice a bit before the flowers turn out really beautiful.

For work you will need:
- corrugated paper in pastel colors;
- corrugated paper in green;
- glue gun;
- wooden skewer;
- scissors;
- cable;
- teip tape green.

From corrugated paper, cut a strip measuring 6 cm x 24 cm and fold it in half. Then we repeat this two more times, as shown in the photo. The result should be a small rectangle.

We cut off the upper part in the form of a semicircle and unfold the strip.

Alternately bend the edges of each petal, and also stretch the inside.


As a result, the workpiece should have this shape.

Gently bend the edges of the petals where they straightened.

We cut off a piece of cable and begin to wrap a blank with petals around it. This must be done carefully, tightly pressing the lower part. We periodically fix the workpiece with hot glue.

If the rose is too small, you can add another blank.

We begin to prepare the leaves. To do this, cut a strip of green corrugated paper and fold it in half twice. Cut the blank in the form of leaves.

Glue the leaves to the base of the rose. We wrap the cable with tape tape along the entire length.

This looks like a finished rose made of corrugated paper.

To create a bouquet, use paper in different shades. Due to this, it will look more gentle and natural.

Paper flower arrangement
To decorate a room it is not necessary to make a voluminous, complex composition. A delicate bouquet of small flowers looks no less stylish.

We will prepare such materials:
- green and beige paper;
- wooden skewers;
- scissors;
- pencil;
- hook or dots;
- PVA glue;
- golden sparkles;
- decorative vase.

On paper, draw a template in the form of a simple flower with five petals and cut it out.

Transfer the template to green paper and cut the blanks based on the desired number of colors. We cut out twice as many blanks from beige paper.

Using a hook or dots, draw lines on each beige flower so that they intersect in the center. We bend them along the lines. As a result, each blank looks more voluminous.

On the green blank we make an incision. We shift one edge to the other and slightly press. Due to this, it will also be voluminous. We repeat the same with the rest.

In the center of the green blank we apply a drop of PVA glue and apply a beige blank. On top of it, apply a little more glue and apply the same workpiece, slightly shifting it.

In the central part of the flower we apply a little glue and sparkles. Repeat the same with each flower and leave them to dry completely.

To fix the flower on a wooden skewer, you need to pierce it a bit and apply glue.

We place all the flowers in a decorative vase. A beautiful, delicate composition is ready.

The presented master classes are quite simple in execution. Therefore, be sure to try repeating and sharing your work in the comments.
Watch the video: Fresh flowers dipped in wax for Preservation. Preserving Flowers. Preserving Roses (November 2024).


-
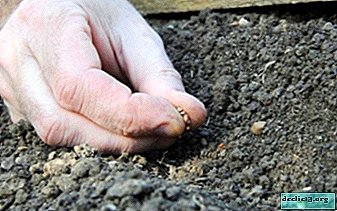
Unpretentious plants in a flower carpet: stonecrops
Groundcover plants are widespread among gardeners. They have several advantages. Unlike other flowers, they are not whimsical, grow on any soil, they can be grown in the sun and in the shade, protect the soil from sunlight, and most importantly, their seeds are bought once and sown only once. ... -
-

-