Gardener's dream is an orchid: how to grow it?

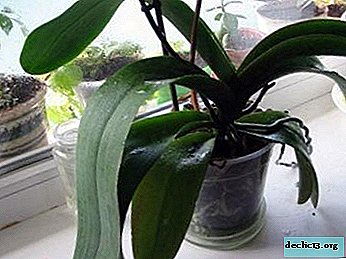
Orchid is the dream of any grower. With what impatience you were waiting for her purchase, with some trepidation, choosing a plant suitable for you. And now you bring the beautiful orchid home.
But to buy, choose and bring to the house is not the most important thing. The most important thing is to know how to grow it correctly so that the plant delights you with its beauty.
In the article we will tell you how to grow an orchid, what difficulties can overtake you and how to easily overcome them.
Features
Like any plant, an orchid has its own characteristics in the cultivation and care:
- During active growth (winter-spring), orchids need to be provided with good lighting and plenty of water.
- In the period of intensive development (in summer) orchids need regular watering and top dressing.
- At the end of summer, reduce the temperature by 4-6aboutC and reduce watering.
- In winter, we increase lighting and reduce watering. The stage of dormancy and flowering begins.
Home views
In nature, orchids can grow freely on other plants (in the crowns of trees). But this does not mean that they can not be properly grown at home. There are certain types of orchids that grow well at home and delight the beauty of their owners (read more about the conditions for keeping orchids in the house here).
For home cultivation, these types of orchids will be distinguished:
- Phalaenopsis.
- Cattleya.
- Denbrobium.
- Wanda.
- Dracula
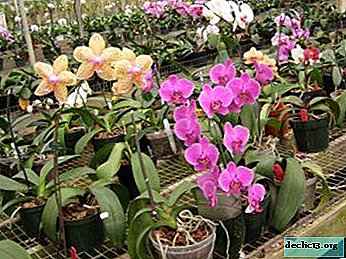
How are they grown on an industrial scale?
Most of the orchids that are sold in our stores are grown in greenhouses and greenhouses. When buying an orchid, we can find out where it was grown:
 Wherever she is grown, the process of her growth begins with the stage of the baby. Orchid babies grow in trays for 30 weeks. Greenhouse workers check the condition and appearance of the children during growth.
- Next, the children are transplanted into a transparent (namely transparent) pot, in which they will grow in the greenhouse. Children are transplanted exclusively by hand.
- Then a label with information about orchids (name and color) is glued onto the pot.
- Then orchids are sent to the greenhouse, where they are grown for 10 weeks.
- After 10 weeks, orchids fall into the workshop, where they are placed in a special plastic pot. In such pots, orchids receive the same conditions for growth: the amount of water and space. They are in this pot for 16 weeks, and then placed in a larger pot and are in it for 3-4 weeks until the peduncle begins to grow.
- Then orchids are placed for 8 weeks in a special cold part of the greenhouse with a temperature of 19aboutFROM.
 Wherever she is grown, the process of her growth begins with the stage of the baby. Orchid babies grow in trays for 30 weeks. Greenhouse workers check the condition and appearance of the children during growth.
Rules
It is necessary to fulfill certain growing conditions:
- The plant does not like direct sunlight.
- Provide a room with a temperature of +15aboutC and not higher than +25aboutFROM.
- Provide moderate watering so that the water does not stagnate in the soil. Humidity for growing should not exceed 70%. At a low humidity of 40-50%, ensure spraying of the plant.
- Lighting is important for a flower like air. In autumn and winter, to provide additional lighting with artificial lamps - to create a 12-hour daylight (we talked about how to care for an orchid in autumn and winter at home in this article).
How to grow a flower at home?
- Start with soil preparation and capacity:
- planted only in plastic pots, they have enough space for the root system of the flower and they are equipped with a drain of water (excess moisture does not accumulate);
- the soil should be whole pieces of medium-sized bark (2-3 cm).
- Then select your growing technology:
 from the root - take the root out of the pot, shake from the soil, divide the rhizome with secateurs, sprinkle with charcoal (so that the plant does not hurt), place the parts of the root in pots with soil, do not water it, and spray it 2 times a day;
- from a bulb - pseudo-bulbs (bulbs) we buy in a store, free with a disinfected knife from small pseudo-bulbs, sprinkle slices with charcoal and plant them in moss;
- cuttings - with a sterile knife from an orchid we cut off the side shoot (approximate length 15 cm), sprinkle the sections with charcoal, lay the cuttings in a horizontal position on the moss in a plastic container, cover with plastic wrap, put it in the room (25aboutC), after the appearance of the roots, we plant it in a pot;
- from the baby - we grow the baby (leaves should be 3 cm), then the baby is wrapped in moss (moss should not be dry), as soon as a root of about 5 cm grows from the baby’s base, it is placed in a pot with soil.
 from the root - take the root out of the pot, shake from the soil, divide the rhizome with secateurs, sprinkle with charcoal (so that the plant does not hurt), place the parts of the root in pots with soil, do not water it, and spray it 2 times a day;
There is also a way to grow orchid seeds.
When growing orchids at home, you may encounter such difficulties and difficulties:
- falling kidneys and leaflets - not enough moisture or light;
- leaves may ripple or wrinkled edges - the room is too hot (the temperature should spread by about 8 degrees during the daytime at night);
- the roots peek out of the pot - it's okay, just transplant the orchid into a larger pot;
- sluggish leaves - excessive watering;
- the orchid does not bloom - the flower needs thermal stress, placed in a room with a temperature of 8-10 degrees lower.
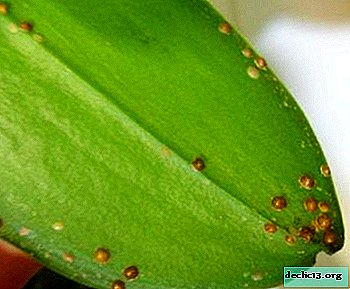
Diseases and Pests
Reference! If you have difficulty growing, your plant may be sick or pests interfere with it.Orchid Pests:
 aphid - if insects are washed off a little with water, if severe damage - use a soap solution;
- wood lice - place the flower pot in a basin with warm water (you can use soap) for 5-7 minutes, the insects will pop up themselves;
- roundworms - place a flower pot in hot water (40 degrees) for 60 minutes, but there is a risk of plant death, it is better to use the drug Fitoverm;
- scale shield and false shield - cover the soil with oilcloth, wash off the tubercles from the plant, treat with insecticide, after 5-7 days, treat with soapy water;
- thrips - treat the plant and root system with Phytoorm emulsion concentrate, transplant, repeat the treatment three times in 5-7 days;
- mealybug - treat the substrate and the aerial part of the orchid with an insecticidal preparation, examine the leaves and remove the found individuals;
- whitefly - close the pot with the earth with a plastic bag, wash off all whitefly larvae dipped in a soap solution with a rag from the surface of the orchid, treat the substrate with Fitoverm or Aktellik;
- spider mite - wash the entire plant with soap and water, treat the place where the plant stood, treat with an insecticide and close it in a plastic bag for 4 days, inspect one week after removing the packet. If necessary, treat it again with an insecticidal preparation.
 aphid - if insects are washed off a little with water, if severe damage - use a soap solution;
Orchid Diseases:
- bacterial spots on the leaves - cut the leaves, brush with rock salt and immediately rinse it off, do not leave it on the plant;
- powdery mildew - water the plant strongly, after 3-4 hours, treat with carbendazim or flutriafol preparations;
- sooty mushrooms - treat with diphenoconazole preparations, wait 2-3 weeks, if it does not improve to cut the affected leaves;
- rot - places of rot cut with a disinfected knife, sprinkled with charcoal.
In the video, possible diseases and pests of orchids are examined in detail, flower treatment options are considered.
Secrets for Beginners
 Spray the plant with soft water.
- For the beauty of orchids, use soft light.
- Water orchids over the ground, so the water passes through the entire pot and the soil is enriched with oxygen.
- Once a month, feed the plant.
- Transplant orchids every 2 years.
- Control the temperature for flowering plants.
- Half wilted inflorescences.
- Boiled water should always be in the stand of the pot of a blooming orchid.
- Do not transplant the plant during flowering.
- Put a clove of garlic in each pot; it repels pests and flower midges.
- At night, leave a turned on table lamp for plants.
 Spray the plant with soft water.
Follow these simple rules when caring for your plant and then it will delight you with bright, beautiful and healthy flowering.


-
The most fashionable hairstyles for women, children and adolescents
With the help of hairstyles, women make the image original and fresh. Each fashionista can choose a haircut that matches her personality. The main thing to know is the most fashionable hairstyles and how to choose the right haircut for a woman, man, child and teenager. I will consider fashionable women's and teenage haircuts and hairstyles, you can choose the appropriate option. ... -

-

-