Clivia transplant at home. When and how often to do it?

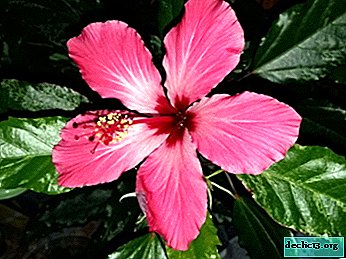
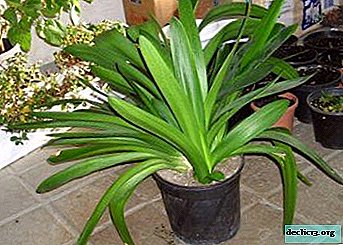
Clivia is an elegant and stylish houseplant, which is very unpretentious, and under favorable conditions, year after year, pleases with its flowers. Its leaves are surrounded by a lush halo of a bouquet of inflorescences of bright joyful tones.
Clivia blooms usually in the last third of winter and remarkably brightens up the snowy cold days with a piece of summer greenery and flowering. After a certain time, clivia will need to be transplanted. The roots of clivia are gently liberated from the soil and transferred to a new pot, falling asleep with fresh soil, since the old one is already exhausted. Next, we will talk in detail about how to plant clivia at home.
How to plant a plant at home?
Clivia, as the owner of a complex and interwoven root system, is difficult to undergo manipulation with transplantation, there is a high risk of rotting of the root system. Transplanting the plant is required to update the soil and to expand the size of the pot in accordance with the overgrown roots.
There are two ways to update the soil. and solutions to root fibers knocking out of the soil: transplantation and transshipment.
 Transshipment done once in two years immediately after the flowering period ends, this is typical for adult clivia care. For young flowers, transshipment is done annually. During transshipment, the plant is carefully dumped out of the old pot along with an earthen lump.
They take the pot a little wider and roll the plant there, increasing the volume of the earth and not destroying the integrity of the soil coma, which is braided by the roots of clivia. If we are talking about the first two years of the plant's life, then a little ripper in the form of sand or perlite is added to the top layer.
- When transplanting the root system is completely cleared of the earth and filled up with new soil.
 Transshipment done once in two years immediately after the flowering period ends, this is typical for adult clivia care. For young flowers, transshipment is done annually. During transshipment, the plant is carefully dumped out of the old pot along with an earthen lump.
Norms and Rules
Conditions (temperature, humidity)
Clivia is not demanding on humidity parameters, but as an optimum temperature for the event, there will be a usual room temperature of 20-25 degrees.
Transplant Preparation
Drainage
Fill the drainage layer to the bottom of the pot from expanded clay granules, small pebbles or gravel, from small fragments of red brick. This is necessary to regulate the moisture content of the earth.
Disinfection
 The need for action is caused by the likely presence in the soil of harmful bacteria and larvae of parasitic insects that cause diseases in plants (for the causes of clivia diseases and methods for their treatment read here). There are four ways to disinfect the soil.
The first is when the soil is poured with boiling water. The second, when they make the treatment with a solution with a minimum percentage of potassium permanganate. The third - the soil is heated in an oven at 250 degrees for ten minutes. The fourth method is annealing in the microwave for three minutes at maximum temperature.
Sometimes resort to the use of chemicals for the purpose of antiseptic treatment, but they destroy not only harmful factors, the healthy soil microflora is also disturbed.
Fertilizers
After the antiseptic part, the soil is enriched with nutrient fertilizers.
Recommendation! Traditionally, clivia uses phosphorus-containing compounds, for example superphosphates or phosphate rock. They put an average of thirty grams.For young seedlings, loose soil is more suitable, for this reason perlite or sand is mixed into the soil based on five parts of the earth, one part of the product.
Instruction manual
- Start the process 4-5 hours after watering.
- Prepare the bedding for the plant, you can use a piece of oilcloth or flooring from newspapers.
- Pour the soil from the bag into the basin, take care in advance of the presence of a scoop for pouring soil into the pot. It is unacceptable to use sharp equipment, you can damage the roots.
- Wear rubber gloves to protect your skin.
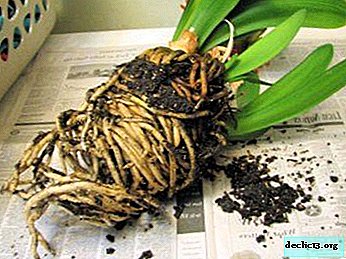
- Carefully remove the roots from the pot. Perhaps this is the most responsible and stressful moment of the whole event.
 If the plant is at least two years old and no more than eight, then clean the roots of the earth by washing with water at room temperature.
- Carefully examine the root for affected areas.
- In the presence of sick and rotten parts of the root system, you need to carefully cut off these areas and process the places of the slices. For processing, regular charcoal or pharmacy activated should be ground.
Sprinkle the damaged powder with the resulting powder. It is unacceptable to use hookah charcoal or charcoal tablets for burning tarry incense, since additives are added to ease the fire, which can cause serious damage to the plant.
- Pour the drainage mixture into a new pot. The layer thickness should be about a quarter of the total volume.
- Make an earth cushion from new soil five to seven centimeters thick.
- Insert clivia exactly in the center of the bowl.
- Carefully fill the voids along the contour around the root system.
- Three centimeters of soil fall asleep on top. It is important not to deepen the neck of the root, it should be left above the earth layer, if you plant a plant in this way, then the lower leaves will rot. That is, the roots are completely protected by the soil, and the neck remains above the ground.
- Transshipment is done according to the same principle, only the lower soil layer is poured smaller, and only small gaps have to be filled along the edges, 3-5 cm wide. In order to free a lump braided by roots from excess soil, the plant is gently rolled on the table and only then placed in a new container.
- After transshipment or transplantation, clivia is put in a place with reduced lighting for a day or even a couple of days. Then the flower is returned to its original place. Usually, after a while, the development of the plant is activated, it significantly increases.
 If the plant is at least two years old and no more than eight, then clean the roots of the earth by washing with water at room temperature.
Important Nuances
Soil composition
The pH should be around six units, since clivia loves slightly acidic soils. Also an important indicator is the looseness and lightness of the soil.
To achieve such norms, middle peat, turf and compost are combined. Charcoal or bark, or verumlite, is added to the soil. You can take ready-made land for orchids, its composition corresponds to the vital needs of clivia.
The required quantity and varieties of fertilizers for soil
 Organic and mineral fertilizers are added to feed clivia into the ground every couple of weeks from spring to the end of the summer season. Mineral fertilizer is bred at the rate of two grams per liter of water. Organic is sold in liquid form and is dosed according to individual instructions for the product.
Organic and mineral nutrition is done alternately, every other time. When transplanting, the soil is enriched with phosphates, and mineral or organic fertilizer is poured after some time, if the transplant coincided with the period of the recommended organic-mineral recharge.
From the beginning of October until the appearance of the first flower-bearing shoot, they do not make water. Mullein, ash, compost, sapropel are also taken as organics.
Tableware
As already mentioned, the new transplant container should correspond to the volume of the braided earthen coma. Clivia began to need more space for its roots, and before buying, they estimate the approximate volume of the flower pot to replace for the old one.
The shape of the vessel should be in the form of a cylinder, since the roots of clivia develop downward vertically. Tapering in the bottom of the pots are not suitable here, they will not allow the root system to gain growth and strength.
The height of the pot is calculated as follows - five centimeters per soil pillow and three to four per drainage embankment are added to the length of the earthen coma. Also, two or three centimeters are added for the upper indent from the edge of the pot, that is, from the open part of the neck of the root of the plant to the edge of the container. This open area without soil can be sprinkled with expanded clay moisture regulator, which prevents the formation of mold on the ground during irrigation.
Advice! Due to the vulnerability of the roots of the flower, it is advisable to take not ceramic, but plastic pots, their smoothness provides easy extraction during transplantation. The vessel should be with holes in the bottom for the outflow of excess moisture.Getting transplant material
It is necessary to plant clivia, both for overgrown pot plants, and for purchased options. The roots of the purchased flower are in a specific temporary substrate and need a mandatory transplant for life and development. The transplant technology is exactly the same, with the only difference being that a transshipment method is not possible for a purchased plant.
Features and subsequent care
 The first three days the plant needs to create a rest zone. To do this, place clivia in the shady part of the room. After that, the pot is rearranged in a favorable place, with diffused lighting and the appropriate temperature of the season.
It is known that clivia in the autumn-winter period loves coolness and feels great at a temperature of 14-15 degrees. After transplanting, such a regimen is not suitable, and they place it in similar conditions no earlier than a month or two, waiting until the plant is strong and fully settled.
Fertilizers begin to be applied after the flower has gained strength, has taken root, has recovered. This is important because there is an activation of the reserves of forces of the plant itself, which requires a period of "independence", since the internal resources of the vital forces of a flower are revealed only in conditions without additional nutrition. Prior to this, watered in normal mode with clean water.
Find out more about the care of clivia, as well as about the features of cultivation, in a separate article.
When and how often do you need to do this?
In fact, there is no clear transplant regime; this action is carried out when the need arises. The main reason for the transplant is that the rhizomes outgrew the volume of the pot, at which point the roots begin to bulge out of the ground, peeking from the edges.
Reference! The optimal transplant time is the period after flowering. Frequency for adult flowers is once every two or three years, for young ones annually.Possible problems
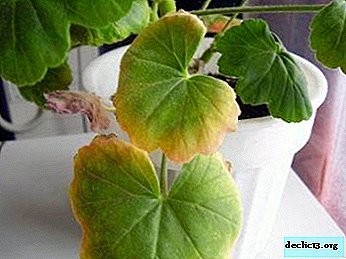
The reason for this is mechanical trauma to the root system or deepening of the neck of the root. When deepened, the plant thus normalizes the ratio of the ground and underground parts.
With mechanical trauma, the process no longer has a corrective effect, but proceeds as an indicator of a painful phenomenon. In this case, you can make watering with Zircon. Concentrate from Echinacea extraction, a powerful antioxidant, acts as an antimicrobial factor and biostimulant at the same time. This drug is used only in cases of urgent need. You can find out what other problems are possible when growing clivia and how to deal with them here.
Useful video
Watch a video about Clivia transplant:
Conclusion
Do not forget about the flower’s love for the cramped pot, otherwise the flowering process will not begin until the roots fill the voids. Proper care of clivia and compliance with the rules of transplantation will make the plant beautiful, strong and durable.


-
Making a changing table with your own hands, types of designs
The list of essentials for newborns includes a first-aid kit, bath, clothes, stroller and chest of drawers. Often, parents also acquire a special changing table for the baby. This is a convenient device that helps save time and energy. However, do not rush to spend money on the finished design. It is quite simple to assemble a changing table with your own hands. ... -

-

-